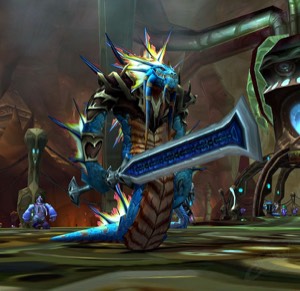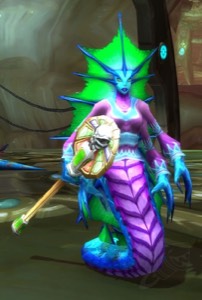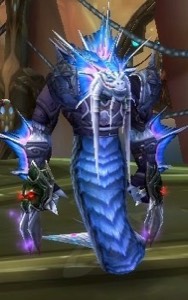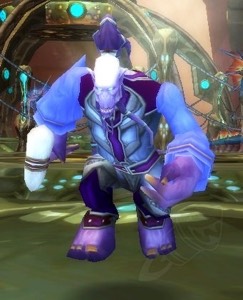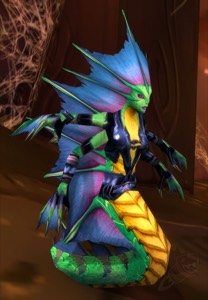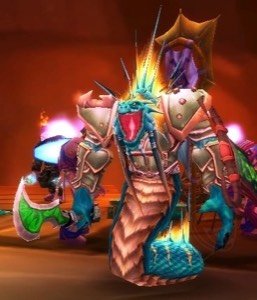
Vis Maior
Raid:
Buffs:
Group 1
— empty —
— empty —
— empty —
— empty —
— empty —
Group 2
— empty —
— empty —
— empty —
— empty —
— empty —
Group 3
— empty —
— empty —
— empty —
— empty —
— empty —
Group 4
— empty —
— empty —
— empty —
— empty —
— empty —
Group 5
— empty —
— empty —
— empty —
— empty —
— empty —
(0)
Critical Buffs
Raid-wide Buffs
Recruitment gaps
Buff Class Spec Priority Application Benefit Trigger Description
Attendance Audit
Record Attendance
Leaderboard
Rank Player Class Points Lifetime Last Raid
Rank Player Class Level Parse GS Main Spec Off-Spec Profession 1 Profession 2 Attunements M/A L R Team
Loading pending…
Loading scout…
Loading ban list…
Gargul
Loading wishlist…
Loading Import…
Loading Export…
Loading History…

Configure Gargul

Every loot master needs the Gargul addon set up the same way so awards export cleanly and we capture the full roll data. Work through the settings below (/gl → cog, or /gargul settings). Screenshots show exactly what to pick.

  1. 1Export awarded loot as Detailed (JSON)

    In Settings → Exporting Loot, set “The format in which awarded loot should be exported” to Detailed (JSON). This is the format that carries the roll data we need — the other formats drop it. Leave the include disenchanted / off-spec options ticked so nothing is missed.

    Gargul Settings → Exporting Loot: export format set to Detailed (JSON)
    Settings → Exporting Loot → set the export format to Detailed (JSON).
  2. 2Import our loot data as TMB

    In Settings → TMB and DFT (or type /gl tmb), click “TMB Data” and paste the export from this site’s Loot → Gargul → Export page. We use the TMB format — that’s what loads everyone’s wishlist / priority into Gargul so the right info shows while you award loot.

    Gargul Settings → TMB and DFT: click TMB Data to import our website's TMB export
    Settings → TMB and DFT → TMB Data → paste our website’s TMB export.

More settings will be added here — check back as we finalise the loot workflow.

Pick a raid config to see tier-token contention.
Pick another raid above to see comparison contention.
← All guides
Watch overview

Serpentshrine Cavern

6 bosses · Phase 2
Raid admin
Most recent
Copy from

Raiders

Tanks · 2 in comp

PaladinAldread
WarriorAchtungg

Healers · 4 in comp

DruidCelki
PaladinTekpal
PriestHideonbushes
PriestRazzen

Melee DPS · 8 in comp

PaladinKonzs
PaladinShellbane
RogueLongshank
RogueRedvalor
ShamanGreybusch
WarriorSilentjedi
WarriorSlurrie
WarriorToyrich

Ranged DPS · 10 in comp

HunterCharcharr
HunterGriztor
HunterLouislipps
MageCongelatore Arcane
MageKellesia
ShamanUnsu
ShamanVirod
ShamanXynk
WarlockDestrana
WarlockEnvix

Trash Mobs

Hydross

Pre-Hydross — Beast Tamer + Hate Screamer pack

Hate ScreamerFACE AWAYTANKAchtunggMDCapoluco
  • AoE silence.
Beast TamerCLEAVETANKBearlfMDCharcharr
  • Face away from raid.
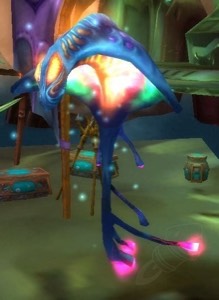
Serpentshrine SporebatCCTANKBearlfMDCharcharr HIBERNATE
  • Charge — Holy paladin can soak, or druid hibernate.

How to

  • Stack similar to Gruul trash and nuke the Hate Screamers down.
  • Kill order: Hate Screamer → Sporebats / Beast Tamer.

Pre-Hydross — Underbog Colossus

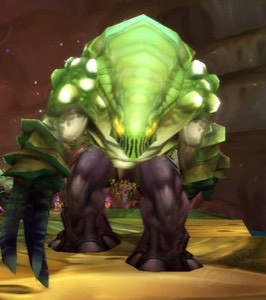
Underbog ColossusTANKAchtunggMD
  • Random ability set per Colossus + random death-spawn.

Random abilities (one per Colossus)

  • Spore Quake — large AoE quake.
  • Frenzy — Hunters Tranq Shot.
  • Acid Geyser — targeted player runs to the tank.

Death-spawn (also random)

  • Spawns 2 adds, or mini adds, or a Toxic Pool, or Blue Mushrooms (heal + mana restore).

How to

  • Random ability set. Each Colossus rolls one of: Spore Quake, Frenzy, or Acid Geyser (Quagmirran-style).
  • Ranged stay 30 yards from the Colossus.
  • Everyone moves out on Quake.

Lurker + Vashj

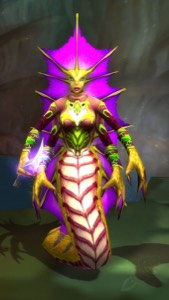
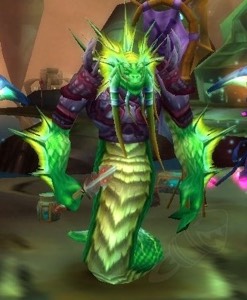
Lurker / Vashj approach — naga pack

Vashj'ir Honor GuardTANKAchtunggMD
  • Mortal Cleave, Fear, Knockback.
Coilfang Priestess x2CC IMMUNETANKBearlfMDCharcharr
  • Heal + Angel Form on death.
Coilfang Shatterer x2TANKMDCapoluco
  • Shatter Armor — 50% armor reduction and 35% damage-dealt reduction.
Greyheart Technicians (non-elite) x3–4TANKMD
  • Auto attacks only.

How to

  • Tremor Totems for the Fears.
  • Kill order: Honor Guard → Priestesses → Shatterers.

Additional naga trash — Serpentguard + Fathom-Witch

Coilfang Fathom-WitchMC + KNOCKBACKCCTANKMDCapoluco SHEEP
  • Mind Control, Shadowbolt, Shadow Nova.
  • Shadow Nova knocks back — tank against a wall.
Coilfang SerpentguardCCTANKMDCharcharr SHEEP
  • Spell Reflect + Corrupt Devotion Aura (25% armor reduction).

How to

  • Kill Fathom-Witches first.
  • Grounding Totem the MC if you can. If you don't ground it, MC'd players can be CC'd.
  • Kill Serpentguards after.

Leotheras

Pre-Leotheras — Greyheart humanoids

Greyheart NethermageBLINKS · FACE AWAYCCTANKMD SHEEP
  • All mage abilities minus Polymorph. Can blink. Casts Cone of Cold — face away.
Greyheart SkulkerCCTANKMD SHEEP
  • Kicks any caster casting in melee. Fast physical damage. Can be stunned.
Greyheart TidecallerCCTANKMD SHEEP
  • Water Elemental Totem, Poison Shield (purge), Poison Debuff (dispel).
Greyheart ShieldbearerCCTANKMDCapoluco SHEEP
  • Charges. Disarm them, stack to absorb the charge.

How to

  • Kill order: Nethermage → Skulker → Tidecaller / Shieldbearer.
  • Kill totems on sight. Dispel the Poison Debuff. Purge Poison Shield off the Tidecaller.
  • If Nethermages blink: move as a raid to them, or have ranged nuke them down.

Morogrim

Pre-Morogrim — Murloc patrol packs

These patrol at running speed inside Morogrim's room. Pull back into the previous hallway before engaging.
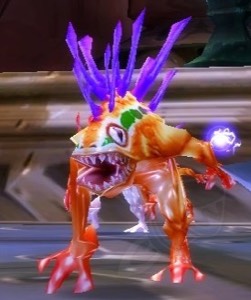
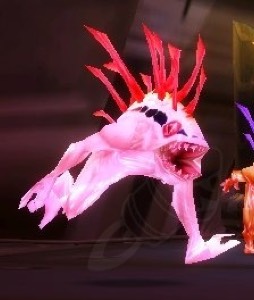
Tidewalker Depth-SeerKILL FIRSTTANKMD
  • Tranquility.
Tidewalker WarriorTANKMDCapoluco
  • Strong melee attacks. Tranq Shot works.
Tidewalker ShamanTANKMDCharcharr
  • Chain Lightning, Lightning Bolt, Lightning Shield.
Tidewalker HydromancerTANKAchtunggMD
  • Frost Nova, Frost Shock, Frostbolt.

How to

  • AoE down, focus the healers first (Depth-Seers).

Hydross the Unstable Boss 1

Hydross the Unstable

NOT TAUNTABLEThreat-swap mechanic — boss cannot be force-grabbed. Misdirects are your best friend.
TANKS NEED RESISTFrost-resist set for Frost phase, Nature-resist set for Nature phase. Assign everyone a spot in the arena.
WARLOCKSThreat meter is not optional — pull threat off and the swap breaks.

Phase flow — tank rotation

FROST · PUREPull state. Aldread tanks the boss in FR set. Raid stays on the Pure side of the line.
NATURE · TAINTEDAfter 1st transition. Achtungg picks up the boss in NR set. Aldread + Bearlf grab the 4 elemental adds spawned by the transition.
SWAPSEach line-cross flips the active boss tank; the off-tank (Bearlf) collects the next add wave. Druids HoT every tank during transition and stay on the correct side if they aggro.

Phase mechanics

Frost Phase — Water Tomb
8-yard spreadable freeze that deals damage over time. Think Kel'Thuzad positioning for melee — spread minimum 8 yards so a single tomb doesn't catch multiple players.
Nature Phase — Vile Sludge
Not spreadable, picks 1 player. 500 nature damage over 25 seconds, plus −50% damage dealt and healing received.
Both phases — Mark of Hydross / Mark of Corruption
Stacking resist debuff that increases damage taken from the active school. Swap phases at 100% stacks.
Phase transition
The 2 flags make an invisible line — crossing it transitions the boss to its other phase. 4 adds spawn on transition — nuke them down. Can be stunned and CC'd.
Threat swap on transition
Call STOP on DOTs and damage before transition to let the next tank take aggro — boss is not tauntable.
Transition timing rule: resist debuff stacks every tick, capping at 250% damage taken. Active tank brings the boss over the line just before the stack that would push the debuff to 250% — maxes DPS uptime per phase, but flips in time for the other tank to start clean. Don't wait for 250% to hit; transition the tick before.

Healer tips

PaladinActive boss tank (whichever of Aldread / Achtungg is on Hydross this phase).
DruidHoT every tank during transition; be on correct side if aggro.
PriestPrayer of Mending OP for tank threat. HoT every tank during transition; correct side on aggro.
ShamanAdd tanks (Aldread / Bearlf on Nature transitions). Chain Heals. Melee position when targeted.

Per-boss assignments

SSC @ SSC @ 2026-07-28 [1]
Tank assignments
Tanks
Frost TankAldread
Nature TankAchtungg
Add TankBearlf
Healer assignments
Healers
Tank Primary HealerKouille
Tank Secondary HealerCelki
Melee > TankRazzen
Ranged > TankNamiek
Extra
FlexSparklehoofs
Utility & mechanics
Misdirect on pull
Hunter
Innervates Druid → Target
Celki
Raid Target Icons
Skull
Skull
Cross
Cross
Star
Star
Circle
Circle
Diamond
Diamond
Triangle
Triangle
Moon
Moon
Square
Square
Positioning
Marker palette
Click an icon to drop it on the map; drag to reposition.
Raid icons
Roles
Classes
Arrows + label
NPC portraits 233
Karazhan 3
Gruul's Lair 4
Magtheridon's Lair 1
Serpentshrine Cavern 9
Tempest Keep 8
Hyjal Summit 2
Black Temple 16
Zul'Aman 10
Sunwell Plateau 7
Heroic Dungeons 48
World / Outland 15
Unknown 110
Positioning diagram
Hydross (Frost Phase)Hydross (Nature Phase)Frost TankAldreadNature TankAchtunggAdd TankBearlf

The Lurker Below Boss 2

The Lurker Below

2 PHASESBoss phase ↔ Add intermission, alternating.
Tip: BigWigs timers are very accurate — melee can run into the water before every Whirl to avoid the knockback.

Phase 1 — Boss

Geyser
Random raid member — 10-yard knockback.
Whirl
Damage + knockback to everyone in melee range. Stay clear or jump into the water.
Spout
Main P1 mechanic. 390° frontal — players go into the water to dodge it. Get out fast, the water ticks for 1k/sec.

Phase 2 — Add intermission

  • 3 groups of 2 adds spawn.
  • Coilfang Guardians — tanked by tanks. Can and should be stunned. 3 will spawn total; ~2–3k per swing.
  • Coilfang Ambushers — CC'd, then killed after the Guardians. 2 spawn on each of the 3 little islands. Don't need to be tanked, but heal anyone they're hitting.
  • After 1 minute or after all adds are dead, the boss respawns and P1 repeats.

Healer tips — both phases

PaladinMT — both phases.
DruidIsland group + add tanks. Very little healing needed in P1.
PriestIsland group, both phases. Very little healing needed in P1.
ShamanMelee, both phases. Chain Heal is OP for the group.

Per-boss assignments

SSC @ SSC @ 2026-07-28 [1]
Tank assignments
Tanks
Main TankAchtungg
Add Tank 1Bearlf
Add Tank 2Aldread
Healer assignments
Healers
Tank Primary HealerKouille
Tank Secondary HealerCelki
Off Tank HealerSparklehoofs
Raid Healer 1Razzen
Raid Healer 2Namiek
Extra
Utility & mechanics
Misdirect on pull
HunterCapoluco
Innervates Druid → Target
Celki
Raid Target Icons
Skull
Skull
Cross
Cross
Star
Star
Circle
Circle
Diamond
DiamondUnsuDiamondEnvix
Triangle
TriangleCapolucoTriangleDestrana
Moon
MoonTagmageMoonFuntage
Square
Square
Positioning
Marker palette
Click an icon to drop it on the map; drag to reposition.
Raid icons
Roles
Classes
Arrows + label
NPC portraits 233
Karazhan 3
Gruul's Lair 4
Magtheridon's Lair 1
Serpentshrine Cavern 9
Tempest Keep 8
Hyjal Summit 2
Black Temple 16
Zul'Aman 10
Sunwell Plateau 7
Heroic Dungeons 48
World / Outland 15
Unknown 110
Positioning diagram
Main TankAchtunggUnsu EnvixTagmage FuntageCapoluco DestranaAdd Tank 2AldreadAdd Tank 1Bearlf

Morogrim Tidewalker Boss 3

Morogrim Tidewalker

2 PHASES100% → 25%  ·  25% → 0%.
2–3 TANKS3 tanks is safer because murloc tanks can get Watery Graved. We'll see 1-tank strats eventually.

Phase 1 — 100% → 25%

Tidal Wave
Tank mechanic — frost damage and attack-speed reduction.
Watery Grave
4 random targets get placed in a bubble. Damage when it expires (fall damage). Marked with X on raid frames.
Earthquake
4k AoE to everyone, and murlocs spawn from the left and right entrances.

Phase 2 — 25% → 0% (Globules)

Globules
No more Watery Grave. Bubbles pick targets and explode if they touch them. Kite Morogrim away as bubbles get close. Bubbles only explode on their target, not random players.

Murloc-tank notes

  • Paladins generate threat by healing a life-tapping warlock.
  • Paladins should rotate cooldowns (trinket / wings) for each pack.
  • Add tanks only need to be 5.2% crit-immune — the mobs are level 71. Gear for high threat.

Healer tips — Graves

PriestCircle of Healing is good on the raid.
Druid (Resto)Not on graves — HoTs lose value when the target is in stasis.
Worst-geared healerGoes on graves. Better healers cover the raid so people don't get graved without full HP.
Ideally not Priest on graves either. CoH is more impactful on the raid.

Per-boss assignments

SSC @ SSC @ 2026-07-28 [1]
Tank assignments
Tanks
Boss TankAchtungg
Murloc TankAldread
Healer assignments
Healers
Tank Primary HealerKouille
Tank Secondary HealerCelki
Off-tank > RaidNamiek
Water TombsSparklehoofs
Raid HealerRazzen
ExtraVirod
Utility & mechanics
Misdirect on pull
Hunter
Innervates Druid → Target
Celki
Raid Target Icons
Skull
Skull
Cross
Cross
Star
Star
Circle
Circle
Diamond
Diamond
Triangle
Triangle
Moon
Moon
Square
Square
Positioning
Marker palette
Click an icon to drop it on the map; drag to reposition.
Raid icons
Roles
Classes
Arrows + label
NPC portraits 233
Karazhan 3
Gruul's Lair 4
Magtheridon's Lair 1
Serpentshrine Cavern 9
Tempest Keep 8
Hyjal Summit 2
Black Temple 16
Zul'Aman 10
Sunwell Plateau 7
Heroic Dungeons 48
World / Outland 15
Unknown 110
Positioning diagram
Boss TankAchtunggMurlocksAldreadMurlocksAldreadMurloc TankAldreadHealersRanged DPSMelee DPSKite Direction (Phase 2)Achtungg

Leotheras the Blind Boss 4

Leotheras the Blind

2 PHASESHuman ↔ Demon.
FIRE-RESIST TANKNeed a fire-resist tank for the Demon phase.
Threat is the main mechanic — DPS will grief this fight. Mind your threat in Human phase or the post-Whirlwind wipe will be on you.

Human phase

Whirlwind
Think Sartura — except no taunt, and it applies a Rend debuff to anyone hit. Lasts 11 seconds.
Threat wipe
Threat resets after Whirlwind.
Healing
Human Leo doesn't hit hard — 1–2 healers on the tank is enough. Other healers focus the Whirlwind targets (Rend tickers).

Demon phase

Chaos Blast
Fireball that applies a stacking debuff increasing fire damage taken per stack.
Insidious Whisper
Demons spawn on random players. Only the targeted player can attack their demon. Kill it before 30s or you get MC'd and need to be killed yourself.

15% — Both Sides Active

Both Demon and Human are active simultaneously below 15%. Ignore the Demon, kill the Human.

Healer tips

PaladinSpread evenly across the raid.
DruidSpread evenly — HoTs on Whirlwind targets.
PriestSpread evenly — Whirlwind-target Rend coverage.
ShamanSpread evenly across melee groups.

Per-boss assignments

SSC @ SSC @ 2026-07-28 [1]
Tank assignments
Tanks
Leotheras TankAchtungg
Demon Form TankAldread
Healer assignments
Healers
Tank Primary HealerKouille
Tank Secondary HealerRazzen
Rend DebuffCelki
Raid Healer 1Namiek
Raid Healer 2Sparklehoofs
Extra
Utility & mechanics
Misdirect on pull
HunterCapoluco
Innervates Druid → Target
Celki
Raid Target Icons
Skull
Skull
Cross
Cross
Star
Star
Circle
Circle
Diamond
Diamond
Triangle
TriangleCelkiTriangleKouilleTriangleVirod
Moon
MoonNamiekMoonUnispeedMoonDestranaMoonEnvixMoonXynk
Square
SquareRazzenSquareOkruSquareSparklehoofsSquareTagmageSquareUnsu
Positioning
Marker palette
Click an icon to drop it on the map; drag to reposition.
Raid icons
Roles
Classes
Arrows + label
NPC portraits 233
Karazhan 3
Gruul's Lair 4
Magtheridon's Lair 1
Serpentshrine Cavern 9
Tempest Keep 8
Hyjal Summit 2
Black Temple 16
Zul'Aman 10
Sunwell Plateau 7
Heroic Dungeons 48
World / Outland 15
Unknown 110
Positioning diagram
Razzen Okru Sparklehoofs Tagmage UnsuNamiek Unispeed Destrana Envix XynkCelki Kouille VirodHuntersLeotheras TankAchtunggDemon Form TankAldreadMelee DPS

Fathom-Lord Karathress Boss 5

Fathom-Lord Karathress & the Fathom-Guards
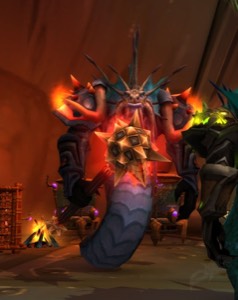
COUNCIL FIGHT4 enemies up at once. Fight ends when Karathress dies.
TANK + HEAL FIGHTPurely about keeping the tanks alive. 6 healing is incredibly comfy here.
Karathress steals abilities. When a Fathom-Guard falls, Karathress gains one of their abilities.
If any Guard is still up at 75%, Karathress gets a +65% damage and speed buff — kill order matters.

The Lords

Fathom-Lord KarathressBEEFIEST TANKTANKAchtunggMD
  • Cataclysmic Bolt — hits a mana user for 50% of their HP.
  • Sear Nova — fire damage to everyone in melee range.
Fathom-Guard Tidalvess (Shaman)KILL FIRSTTANKBearlfMDCharcharr
  • Earthbind, Poison Cleansing, and Spitfire Totem.
  • Kill all totems ASAP, especially Spitfire — it deals more than half a player's HP in damage.
Fathom-Guard Sharkkis (Hunter)TANKAchtunggMD
  • Multi-toss
  • Leeching Throw — drains HP + mana on random target for 12s.
  • Summon Lurker / Sporebat — elemental or sporebat pet; can be CC'd but should be killed.
  • The Beast Within — +30% damage buff.
Fathom-Guard Caribdis (Priestess)"CARDI B"TANKMDCapoluco
  • Cyclone
  • Water Bolt Volley
  • Healing Wave
  • Tidal Surge

Kill order

Tidalvess → Sharkkis → Caribdis → Karathress. Caribdis can be skipped (fight ends on Karathress' death).

How to

  • Beefiest tank on Karathress and Sharkkis.
  • One tank on Tidalvess and pet — kill this first.
  • One tank on Caribdis.
  • On pull, use Misdirects on each tank. Pull Caribdis far away (resto druid + tank only) to out-range her heal on the rest of the Lords.
  • Kill Tidalvess first. Always kill the totems fast. After he falls, Karathress now has Spitfire Totem — keep killing totems.
  • Kill Sharkkis — Karathress now has the damage buff.
  • Kill Caribdis with ranged only (avoid the Cyclones), interrupt heals.
  • Kill Karathress.

Per-boss assignments

SSC @ SSC @ 2026-07-28 [1]
Tank assignments
Tanks
KarathressAchtungg
TidalvessBearlf
SharkkisAchtungg
Caribdis
Healer assignments
Healers
MT HealerKouille
OT1 > MT (A)Razzen
OT1 > MT (B)Namiek
OT2 HealerCelki
Raid HealerSparklehoofs
ExtraAetharya
Utility & mechanics
Misdirects Target → Hunter
Karathress
TidalvessCharcharr
SharkkisFuntage
CaribdisCapoluco
Innervates Druid → Target
Celki
Raid Target Icons
TidalvessBearlf SharkkisAchtungg KarathressAchtungg Caribdis
Positioning
Marker palette
Click an icon to drop it on the map; drag to reposition.
Raid icons
Roles
Classes
Arrows + label
NPC portraits 233
Karazhan 3
Gruul's Lair 4
Magtheridon's Lair 1
Serpentshrine Cavern 9
Tempest Keep 8
Hyjal Summit 2
Black Temple 16
Zul'Aman 10
Sunwell Plateau 7
Heroic Dungeons 48
World / Outland 15
Unknown 110
Positioning diagram
CaribdisKarathressAchtunggTidalvessBearlfHealersRanged DPSMelee DPSInterruptsShankfacerInterruptsSlurrie

Lady Vashj Boss 6

Lady Vashj

3 PHASESBoss → Intermission (adds + pillars) → Boss with Sporebat poison.

Phase 1 — Boss (100% → 75%)

Don't over-spread in P1 — it goes by fast post-nerf. Scariest mechanics: Static Charge and Shock Blast.
Multi-shot
8 targets hit for 2.4k. Unavoidable.
Shock Blast
8–9k instant damage to the tank + 5-second stun. Must be grounded by the tank-group Shaman.
Entangle
Physical root on melee players. Cannot be dispelled. Works: Blessing of Freedom, PvP trinket, Cloak of Shadows, Shapeshift, Blessing of Protection. Priority: tank out of roots first — assign a paladin (ideally OT pally) to Freedom them.
Static Charge
Random target debuff — 2k damage every 2 seconds for 12 seconds to them and anyone around them. Move out of raid.

Vashj still melees hard post-nerf — 3 healers on the boss tank, 2 raid healers for Multi-shot + Static Charge.
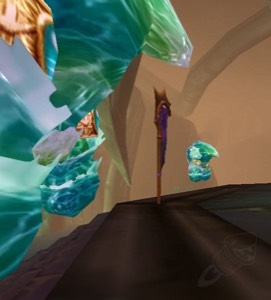
Phase 2 — Add / Pillar phase (75% → 50%)

Vashj is shielded by 4 pillars. Deactivate all 4 to drop her to 50%.
Enchanted Elementals
  • Spawn at the bottom and walk to Vashj to buff her with a stacking 5% damage buff. Ranged kill on the way up.
Tainted ElementalsCORE DROPKOBEBearlf
  • Spawn at the bottom, stationary, spam Poison Bolt. Despawn after 15s.
  • Loot the Tainted Core when killed — this is how you deactivate pillars.
  • While the core is in your bags, you cannot move or cast. Play hot-potato to bring it to a pillar — minimum 2 players.
Coilfang ElitesTANKPnishedMD
  • Cleave and Hamstring. Tank picks up, melee focuses down. Kept in the inner circle.
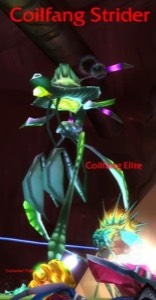
Coilfang StridersAOE FEARKITEShellshamanMD
  • Pulse AoE fear every 2 seconds. Shaman picks up, kites with Frost Shock in the outer circle. Ranged focus down when near.

How to — Phase 2

  • Assign your 4 smartest ranged DPS (preferably hunters) to room quadrants for the Tainted Elementals. When one spawns, ping and call out.
  • Easiest core handling: OT picks up the core after the Tainted dies, throws to ranged, who either waits for OT to reach the pillar (throw back) or throws to a player near a pillar.
  • Pre-assign spots — people should not be moving all over. Ranged focuses Enchanted Elementals in their area; when a Strider enters their quadrant, DPS the Strider down.
  • Melee stays in the inner circle to avoid Strider pathing.
  • Before deactivating the final pillar, make sure no new adds are about to spawn (BigWigs timers are accurate). When P3 starts, finish off the adds first before swapping back to Vashj.
  • Forked Lightning still casts during P2 — the closer you are to Vashj, the more players get hit. Watch Strider pathing visually rather than just relying on the positioning diagram.

Phase 3 — Sporebats (50% → 0%)

P3 is P1 + poison clouds from Sporebats. Poison kills players in 2–3 seconds — you can see the Poison Bolt and its landing spot before it lands. Move before it hits the ground. Bad combo to watch for: Entangle + Poison — melee loosen spread to prevent chain deaths.

Tainted Core macro

/use Tainted Core
/y <------- TAINTED CORE TO: %t !!!
/s <------- TAINTED CORE TO: %t !!!
/script SendChatMessage("!!! YOU HAVE THE CORE !!!", "WHISPER", "Common", UnitName("target"));

Per-boss assignments

SSC @ SSC @ 2026-07-28 [1]
Tank assignments
Tanks
Boss TankAchtungg
Coilfang Elite Tank
Special Roles
KOBEBearlf
Coilfang Strider KiterShellshaman
Healer assignments
Healers
MT > Raid (A)
MT > Raid (B)
Static Charge > RaidRazzen
Raid Healer
Kobe Healer > Raid
Utility & mechanics
Misdirect on pull
Hunter
Innervates Druid → Target
Celki
Raid Target Icons
Skull
Skull
Cross
Cross
Star
StarTekpal
Circle
CircleXynkCircleCongelatore
Diamond
DiamondDestranaDiamondCharcharr
Triangle
TriangleGriztorTriangleLouislipps
Moon
MoonKellesiaMoonEnvix
Square
Square
Positioning
Marker palette
Click an icon to drop it on the map; drag to reposition.
Raid icons
Roles
Classes
Arrows + label
NPC portraits 233
Karazhan 3
Gruul's Lair 4
Magtheridon's Lair 1
Serpentshrine Cavern 9
Tempest Keep 8
Hyjal Summit 2
Black Temple 16
Zul'Aman 10
Sunwell Plateau 7
Heroic Dungeons 48
World / Outland 15
Unknown 110
Positioning diagram
Boss TankAchtunggXynk CongelatoreDestrana CharcharrKite StriderUnsuKellesia EnvixGriztor LouislippsMT > RAID (A)MT > Raid (B)Static Charge > RaidRazzenKobe Healer > RaidTekpalRaid HealerMelee DPS

Open Questions Confirm before next pull

  • Coilfang Priestess — does physical CC (sap, kidney, blind) work? Magic CC is confirmed immune.
  • Morogrim 1-tank strat — when's the gear / comp threshold where we can drop from 3 → 2 → 1 tank? Source sheet flags 1-tank as "eventually" but doesn't gate it.
  • Karathress 2-tank strat — source sheet only documents the 3-tank version, says "I'll update to 2-tank ASAP". Worth us testing on farm.
  • Vashj P2 — who are our 4 designated ranged DPS for the Tainted Elemental quadrants? Need a written assignment per upcoming raid night.
  • Vashj P2 — confirm the hot-potato chain order (OT → ranged → pillar-handler) under the post-nerf Tainted despawn timing (15s).
  • Hydross — does the 250%-cap transition timing still hold post-nerf, or has the resist debuff curve changed?
← All guides
Watch overview

The Eye (Tempest Keep)

4 bosses · Phase 2
Raid admin
Raid config
Copy from

Raiders

Tanks · 2 in comp

PaladinAldread
WarriorAchtungg

Healers · 5 in comp

DruidCelki
PaladinKouille
PriestNamiek
PriestRazzen
ShamanSparklehoofs

Melee DPS · 8 in comp

PaladinKonzs
PaladinShellbane
RogueLongshank
RogueRedvalor
ShamanGreybusch
WarriorSilentjedi
WarriorSlurrie
WarriorToyrich

Ranged DPS · 9 in comp

DruidRinry
HunterGriztor
HunterLouislipps
MageDlaz
MageKellesia
PriestOkru
ShamanVirod
WarlockDestrana
WarlockEnvix

Trash Mobs

A'lar

A'lar approach — Pack 1 (entrance hallway)

AstromancerTANKAchtunggMDCapoluco
  • Molten Armor, Blast Wave, Firebolt Volley.
Bloodwarder Vindicator x2TANKAldreadMD
  • Hammer of Justice, Dispel Magic, Flash of Light.
Star ScryerCCTANKMD SHEEPTagmage
  • Domination, Arcane Blast, Starfall.
Bloodwarder Legionnaire x2CCTANKBearlfMDCharcharr SHEEP
  • Whirlwind — melee move out of it.

How to

  • Tank in the hallway by the entrance if DPS is low — a patting 3-pack will aggro if you can't kill fast enough.
  • Nuke down Astromancer first. Spam-sheep Star Scryer — the Vindicators will dispel it; you can sheep one Legionnaire too if needed.
  • Tanks split up the rest. Dispel tanks immediately when they get stunned by Hammer of Justice — it happens frequently.

A'lar approach — Pack 2 (Marshall + Squires)

Bloodwarder MarshallTANKAchtunggMDCapoluco
  • Whirlwind — does not move while channelling.
Bloodwarder Squire x2TANKBearlfMDCharcharr
  • Stuns and heals.

How to

  • One tank pulls Marshall away from the rest, the other grabs the Squires.
  • Marshall tank runs out of the Whirlwind.

A'lar approach — Pack 3 (Falconers + Hatchlings)

Tempest FalconerTANKBearlfMD
  • Autoshot, Fireshield.
Phoenix Hawk HatchlingTANKAldreadMD
  • Wing Buffet, Silence.

How to

  • LoS pull these in the previous hallway.
  • Tank tucks in the corner to grab all mobs and negate Wing Buffet — best for paladin tank.
  • 2nd tank makes sure other mobs aren't free. Casters outrange the silence.
  • Falconers sometimes shoot through walls — 2nd tank should pull them far back if it happens.

A'lar approach — Pack 4 (Phoenix Hawk)

Phoenix HawkTANKAchtunggMDCapoluco
  • Dive, Mana Burn.

How to

  • Stack into a corner. Have one ranged outside the stack to eat the Dive.
  • Hunters MD pull to prevent accidentally pulling the boss.

Void Reaver

Void Reaver approach — Crystalcore mobs

Crystalcore SentinelCAN ONE-SHOTTANKAchtunggMD
  • Charged Arcane Explosion: arcane AoE to all melee.
  • Trample: physical AoE to all melee.
  • Overcharge: 14–15k arcane to tank — can be spell reflected.
Crystalcore MechanicCCTANKBearlfMD BANISHDestrana
  • Sawblade: bleed debuff on random targets.
  • Recharge: heals nearby Sentinels.
Tempest SmithTANKAldreadMD
  • Fragmentation Bomb: armor debuff.
  • Shell Shock: AoE fire + stun.
  • Power Up: empowers a Sentinel.
  • Golem Repair: heals nearby Sentinels.
Crystalcore DevastatorTANKAchtunggMD
  • Countercharge: adds arcane to autos, can silence in melee.
  • Knockback.
  • Tank against a wall (no specific kill order — tanked separately).

How to

Need absorbs + stamina gear. Sentinels can one-shot tanks. Focus one down at a time. If only one Sentinel is left, the free tank should taunt off the Overcharge target to save their life.
  • Banish all Mechanics, stun/sheep Smiths, then focus Sentinels first. After, take out Mechanics, then Smiths.

High Astromancer Solarian

Solarian approach — Pack 1 (mixed adds)

Astromancer LordTANKMD
  • Fire Shield.
Bloodwarder Legionnaire x2CCTANKBearlfMDCharcharr SHEEP
  • Whirlwind.
Crystalcore Sentinel x2TANKAchtunggMD
  • Same as Void Reaver trash — Charged Arcane Explosion, Trample, Overcharge (14–15k arcane, spell-reflectable).
Bloodwarder Squire x2TANKBearlfMDCharcharr
  • Flash of Light.
Apprentice Star Scryer / Novice Astromancer x8TANKAldreadMD
  • Fireball.

How to

  • Establish threat and nuke. Very easy packs.
  • Paladin tank grabs Scryers + Astromancers. Other tank grabs the Squires.

Solarian approach — Pack 2 (Nether Scryer MC)

Nether ScryerMC RAIDTANKMD
  • Mind Control — hits 4–5 people at a time.
Bloodwarder Legionnaire x2CCTANKBearlfMDCharcharr SHEEP
  • Whirlwind.

How to

  • Pull back into the previous room, nuke the Scryer.
  • (Unconfirmed: mass dispel may remove the MC — needs testing.)

Kael'thas Sunstrider

Kael'thas approach — Pack 1 (Mage + Knight + Centurion)

Crimson Hand Battle Mage x2TANKAchtunggMD
  • Frost Attack, Blizzard, Cone of Cold, Frostbolt Volley.
Crimson Hand Centurion x2RAID-WIPE RISKCCTANKBearlfMD SHEEP
  • Arcane Flurry: cannot be stunned or interrupted by anything but Polymorph. Will wipe the raid if you don't lock it down.
Crimson Hand Blood Knight x2TANKAldreadMD
  • Renew, Flash of Light, Hammer of Justice.

How to

Open with sheeps on Centurions or spam-sheep through the pull. Arcane Flurry will wipe the raid — sheep is the only interrupt.
  • Focus order: Battle Mage → Centurions → Blood Knight.
  • Everyone who can dispel keeps Hammer of Justice off the tanks ASAP.
  • Pull the first pack back to avoid pulling the patrol pack.

Kael'thas approach — Pack 2 (Inquisitor + Centurions)

Crimson Hand InquisitorTANKAchtunggMD
  • Mindflay only. Immune to CC.
Crimson Hand Centurion x2CCTANKBearlfMD SHEEP
  • Arcane Flurry — sheep-only.

How to

  • Sheep the Centurions, nuke the Inquisitor, then kill the Centurions while spam-sheeping them.

Kael'thas approach — Pack 3 (mixed 4-pack)

Crimson Hand InquisitorTANKAchtunggMD
  • Mindflay only. Immune to CC.
Crimson Hand Blood KnightTANKMD
  • Renew, Flash of Light, Hammer of Justice.
Crimson Hand CenturionRAID-WIPE RISKCCTANKMD SHEEP
  • Arcane Flurry — sheep-only.
Bloodwarder MarshallTANKAchtunggMDCapoluco
  • Whirlwind — does not move while channelling.

How to

  • 1 tank grabs the Marshall and drags it out for its Whirlwind.
  • Other tank grabs the other 3, sheep the Centurion.
  • Kill order: Inquisitor → Blood Knight → Centurion → Marshall.

A'lar Boss 1

A'lar

2–3 TANKS3-tank week 1 for easy mode. 2-tankable if you're confident — a warrior or bear can charge to prevent more than 1–2 Flame Buffet ticks while the second tank stays at the bottom for adds.
TAUNTABLEBoss and adds are all tauntable.

Phase 1 — Platform Phase (100% → 0%)

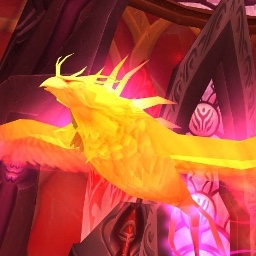
Summon Phoenix Adds
Spawn at the bottom every time A'lar moves between platforms — Tank 3 picks them up.
Flame Buffet
Damage tick whenever no one is in melee range of the boss.
Flame Quills
A'lar flies to the centre of the room and AoEs anyone left on the platforms — everyone jumps to the centre to avoid.
Ember Blast / Rebirth
A'lar explodes when killed and is reborn at 100% to start Phase 2.

How to — Phase 1

  • 1 tank at the bottom, 2 tanks at the top. Boss tanks tank at the edge of the platform so they don't LoS healers.
  • Whichever top tank doesn't have aggro moves early to the next platform to be ready to taunt when A'lar moves.
  • Every platform move spawns phoenixes at the bottom for Tank 3.
  • A'lar randomly flies up for Flame Quills — everyone jumps down to centre. After Quills he goes either to the next platform or back to platform 1, so have 2 tanks ready for each.
  • Post-nerf: A'lar goes left-to-right always — no random platform-to-platform movement.
  • Phase 1 ends at 0%. Kill remaining adds before P2 starts.
  • Ranged DPS kill spawns one-by-one during Flame Quills or in the gap between P1 and P2 — don't AoE them all down at once or you'll kill the add tank.
  • Floor players rotate with the melee group up top — when the boss moves platforms, the bottom team shifts under the new platform so add cleanup stays under whoever's tanking adds.

Phase 2 — Centre Phase

Dive Bomb
Picks a random target, deals fire damage on landing to that player + anyone near them. Spawns 2 phoenixes after.
Flame Patch
Applies fire on a part of the floor — deals fire damage and increases fire damage taken while standing in it.
Charge / Flame Buffet
Charges a random target and deals fire damage to them.
Melt Armor
80% armor reduction on whoever has threat — taunt-swap mechanic.

How to — Phase 2

  • Tank 1 picks up the boss and holds him until Melt Armor. Tank 2 taunts. Melt Armor tank can help bring the adds to Tank 3.
  • Tank 3 holds adds against the wall. Kill 1–2 adds while the boss is in the air during Dive Bomb.
  • Ranged + healers spread out to avoid stacking damage on Flame Patch and Dive Bomb.
P2 timing trap: the first Melt Armor casts ~5s after the first Dive Bomb / adds are out. A prot paladin can bubble off Melt Armor and hold the boss for one more Dive Bomb / Melt Armor cycle, easing the add-to-boss transition.

Per-boss assignments

TK @ TK @ 2026-08-03 [1]
Tank assignments
Tanks
Platform Tank 1 (P1)Achtungg
Platform Tank 2 (P1)Bearlf
Add Tank (P1)Aldread
A'lar Tank 1 (P2)
A'lar Tank 2 (P2)
Add Tank 1 (P2)
Add Tank 2 (P2)
Healer assignments
Healers
Tank Primary HealerKouille
Tank Secondary HealerCelki
Left SideKouille
Right SideCelki
Raid Healer 1Razzen
Raid Healer 2Namiek
ExtraSparklehoofs
Utility & mechanics
Misdirect on pull
Hunter
Innervates Druid → Target
Celki
Rinry
Raid Target Icons
Skull
Skull
Cross
Cross
Star
Star
Circle
Circle
Diamond
Diamond
Triangle
Triangle
Moon
Moon
Square
Square
Positioning
Marker palette
Click an icon to drop it on the map; drag to reposition.
Raid icons
Roles
Classes
Arrows + label
NPC portraits 233
Karazhan 3
Gruul's Lair 4
Magtheridon's Lair 1
Serpentshrine Cavern 9
Tempest Keep 8
Hyjal Summit 2
Black Temple 16
Zul'Aman 10
Sunwell Plateau 7
Heroic Dungeons 48
World / Outland 15
Unknown 110
Positioning diagram
LeftRightTank 1 (P1)AchtunggTank 2 (P2)BearlfAdd TankAldreadTank Primary HealerKouilleTank Secondary HealerCelkiRaid Healer 1RazzenRaid Healer 2NamiekExtraSparklehoofsMelee StartMiddle

Void Reaver Boss 2

Void Reaver

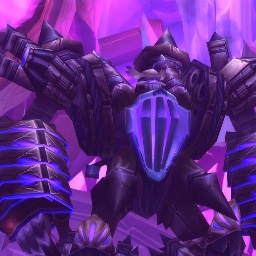
IMMUNE TO TAUNTThreat management matters — no panic-taunt safety net. 1 phase fight.
Arcane Orb
Picks a random player not in melee range, launches a giant arcane bomb. Silences for 6s if it hits.
Pounding
3 seconds of physical AoE damage to everyone.
Knockback
Knocks the highest-threat target back, reducing their threat on that target.

How to

  • 2–3 hunters on the edge of the circle to bait the orbs. It's very easy to step out of the orb.
  • On pull, the group stacks and moves together to aggro — anyone behind/delayed can get targeted for an orb and hit everyone in melee.

Tank options

BEAR SOLOBear can dodge knockbacks. Use Misdirects before knockbacks to prevent threat swaps. Risk: if the tank does get knocked back, the boss moves — risking an Arcane Orb on melee.
2-TANKOT 2nd on threat prevents the boss from ever moving. Use Misdirects on the OT (alternate when tank swaps happen). OT stands behind the boss to prevent parries.
PALADINPaladins have a hard time staying 2nd on threat — feed them extra Misdirects on tank swaps and watch their threat closely.
HUNTERSAlways use Misdirect on cooldown onto the assigned tank — VR's threat is tight and every cast helps.

Mage note: apply Amplify Magic to the raid before the pull (reduces Arcane Orb damage).

Tank tip: Moroes' Lucky Pocket Watch can proc a dodge on the Knock Away.

Per-boss assignments

TK @ TK @ 2026-08-03 [1]
Tank assignments
Tanks
First TankAchtungg
Second TankBearlf
Healer assignments
Healers
Tank Primary HealerKouille
Tank Secondary HealerCelki
Raid Healer 1Razzen
Raid Healer 2Namiek
Raid Healer 3Sparklehoofs
Utility & mechanics
Misdirect on pull
HunterCapoluco
Innervates Druid → Target
Celki
Rinry
Raid Target Icons
Skull
Skull
Cross
Cross
Star
Star
Circle
Circle
Diamond
Diamond
Triangle
Triangle
Moon
Moon
Square
Square
Positioning
Marker palette
Click an icon to drop it on the map; drag to reposition.
Raid icons
Roles
Classes
Arrows + label
NPC portraits 233
Karazhan 3
Gruul's Lair 4
Magtheridon's Lair 1
Serpentshrine Cavern 9
Tempest Keep 8
Hyjal Summit 2
Black Temple 16
Zul'Aman 10
Sunwell Plateau 7
Heroic Dungeons 48
World / Outland 15
Unknown 110
Positioning diagram
First TankAchtunggCapolucoFuntageSecond TankBearlfMelee DPSRanged DPSHealersCharcharr

High Astromancer Solarian Boss 3

High Astromancer Solarian

This fight is braindead easy — but the timing on portals and the P1→P2 transition still trips groups up.

Phase 1 — Human Phase (100% → 20%)

Wrath of the Astromancer
Baron Geddon–like bomb on a random player — move out of the raid or it kills everyone it hits.
Blinding Light
Unavoidable raid-wide arcane damage.
Arcane Missiles
Solarian channels missiles on random raid members — cannot interrupt.
Solarium Portals
Every 50s, portals spawn adds that die almost instantly. After the initial adds, 3 more portals spawn — 1 has Solarian, 2 have priests (interruptible).

Phase 2 — Voidwalker Phase (20% → 0%)

Psychic Scream
AoE fear — drop Tremor Totems.
Arcane Bolt
Single-target arcane bolt.

How to

  • Healers be ready to heal anyone hit by Arcane Missiles immediately. Target-of-target helps a lot.
  • Tanks don't tank until the add phase + the last 20% — she just channels Arcane Missiles before P2.
  • If you get the Arcane Bomb, move out of the raid.
  • After 50s, everyone groups up so all the adds come to one spot — paladin tank picks up aggro and kills them.
  • After they die, 3 portals spawn (1 boss, 2 adds). Both tanks pick up adds; mages counterspell their casts so they walk in toward the boss.
  • Before P2 starts, use all Misdirects on whoever's going to tank — she may not be top threat since she's been AoE-channeling random members.
  • Drop Tremor Totems, kill the boss.

Per-boss assignments

TK @ TK @ 2026-08-03 [1]
Tank assignments
Tanks
Boss TankBearlf
Priest Add TankAldread
Healer assignments
Healers
Tank Primary HealerKouille
Tank Secondary HealerCelki
OT > RaidSparklehoofs
Missiles Target ARazzen
Missiles Target BNamiek
Extra
Utility & mechanics
Misdirect on pull
Hunter
Innervates Druid → Target
Celki
Rinry
Raid Target Icons
Skull
Skull
Cross
Cross
Star
Star
Circle
Circle
Diamond
Diamond
Triangle
Triangle
Moon
Moon
Square
Square
Positioning
Marker palette
Click an icon to drop it on the map; drag to reposition.
Raid icons
Roles
Classes
Arrows + label
NPC portraits 233
Karazhan 3
Gruul's Lair 4
Magtheridon's Lair 1
Serpentshrine Cavern 9
Tempest Keep 8
Hyjal Summit 2
Black Temple 16
Zul'Aman 10
Sunwell Plateau 7
Heroic Dungeons 48
World / Outland 15
Unknown 110
Positioning diagram
Voidwalker Form (P2)BearlfPriest Add TankAldreadMelee DPSRanged DPSHealersWrath of the Astromancer Target (P1)When targeted run out of group (P1)Adds spawn every 50s (P1)

Kael'thas Sunstrider Boss 4

Kael'thas Sunstrider

5 PHASESAdvisors → Weapons → All Advisors → Kael'thas → True Power.
Weapon skill at 350 for everyone who'll be looting a weapon in Phase 2.

Phase 1 — Advisors

Thaladred the Darkener
  • Fixate, Knockback, Silence.
  • Kite to the very bottom of the room before killing — no melee should attack him.
Lord SanguinarTANKBearlfMD
  • Thrash, Bellowing Roar.
  • Fear Wards + Tremor Totems near the boss. Take him to the left of the room.
Grand Astromancer CapernianTANKDestranaMDCapoluco
  • Fireball, Arcane Burst, Conflagration.
  • Assign a warlock to tank (remove Salvation), with a dedicated healer. Drag her a bit south-east.
  • Everyone 30 yards away. Conflag may bug past 30 yards — bait a few people to eat the conflag by staying within range.
Master Engineer TelonicusTANKAchtunggMD
  • Bomb, Remote Toy.
  • Tank to the wall with Sanguinar. Careful with threat — he stops meleeing often to throw bombs.

Phase 2 — Weapons

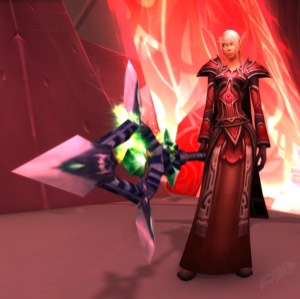
  • Paladin tanks all the weapons except the bow and the 2H axe, up in the centre by KT.
  • Warrior tank picks up the staff and brings it to the Paladin's consecrate.
  • Bear tank drags the axe out (it does whirlwind damage).
  • Two hunters tank the bow out of the raid (multi-shot).
  • All weapons can be interrupted and stunned — use stuns liberally.
  • Kick the Staff and Mace to prevent AoE damage and healing going out.
  • Careful of the Shield's melee damage reflect.
  • Loot your weapon of choice after they die.

Weapon roles

STAFF OF DISINTEGRATIONAll casters + feral — use the on-use ASAP in P3 to negate disorient / stun / silence mechanics.
WARP SLICER (1H Sword)Melee DPS — fast one-hand sword. Fury/Prot warriors + rogues (not Enh shamans — can't use swords; they take the dagger).
DEVASTATION (2H Axe)While it's up it whirlwinds, so a tank drags it out of the stack. Loots to Arms warriors / Ret paladins.
INFINITY BLADE (Dagger)Hunters, Enh Shamans, Warriors, Rogues (Ele shamans + anyone who can equip a dagger). Used to break MCs out in P3 — anyone who can equip this should.
PHASESHIFT BULWARK (Shield)Tanks. While the Bulwark is alive in P2 it reflects melee damage — don't auto-attack it; kick / stun instead. Once looted, the on-use absorbs spell damage — tanks pop it on the Pyroblast at the end of every Shock Barrier in P4 / P5.

Who can take each weapon

Phase 3 — All Advisors

  • All advisors are rezzed and fight at the same time.
  • Ranged focus Thaladred first, then Capernian.
  • Melee focus Sanguinar, then Telonicus.
  • Watch for mass Conflag on Capernian — stay 30 yards away from her.
  • Dedicated healer assigned to keep the Warlock (Capernian's tank) alive.
  • Dagger users break MCs as soon as people get controlled.

Phase 4 — Kael'thas (100% → 50%)

Fireball
Hits the tank for 10k. Melee interrupt these.
Flamestrike
Fire damage on a specific location.
Summon Phoenix
Spawns and is tanked and kited. When it dies an egg spawns — kill the egg or another Phoenix spawns and can overwhelm the raid.
Shock Barrier / Pyroblast
Every minute, KT places a 10-second barrier on himself — DPS the barrier down. He also Pyroblasts for the last 4s of the shield. Interruptible once the shield is depleted, or tanks use the legendary shield on-use to absorb.
Mind Control
Hits multiple raid members. Broken by poking the MC'd player with the legendary dagger.
Ranged stay within 30 yards of melee for the staff's on-use effect.

Phase 5 — Kael'thas True Power (50% → 0%)

All P4 mechanics still active — KT hits harder and adds three new mechanics on top:

Gravity Lapse
The entire raid is lifted into the air and can fly around for 30 seconds.
Netherbeam
During Gravity Lapse, arcane beams deal damage and bounce to nearby players — spread out.
Nether Vapor
During Gravity Lapse, black clouds apply a stacking debuff that reduces total HP to anyone in them — avoid the clouds.
DO NOT DIE TO FALL DAMAGE. Watch for when Gravity Lapse ends so you're close to the ground when it drops you.

Per-boss assignments

TK @ TK @ 2026-08-03 [1]
Tank assignments
Tanks
SanguinarBearlf
CapernianDestrana
Capernian 2
TelonicusAchtungg
Kael'thasAldread
Healer assignments
Advisors Phase 3
Thaladred healer
Sanguinar tank healerSparklehoofs
Capernian tank healerKouille
Telonicus tank healerSparklehoofs
Raid healer 1
Raid healer 2
Phase 4 — Kael'thas
P4 — Kael'thas tank healer 1Kouille
P4 — Kael'thas tank healer 2
P4 — Raid healer 1Razzen
P4 — Raid healer 2Namiek
P4 — Raid healer 3
Utility & mechanics
Innervates Druid → Target
Celki
Rinry
Weapons Phase 2
Cosmic InfuserAldread
DevastationBearlf
Infinity BladeAldread
Netherstrand LongbowCapoluco
Netherstrand Longbow #2Griztor
Phaseshift BulwarkAldread
Staff of DisintegrationAchtungg
Warp SlicerAldread
Raid Target Icons
Skull
Skull
Cross
Cross
Star
Star
Circle
Circle
Diamond
Diamond
Triangle
Triangle
Moon
Moon
Square
Square
Positioning
Marker palette
Click an icon to drop it on the map; drag to reposition.
Raid icons
Roles
Classes
Arrows + label
Kael'thas weapons
NPC portraits 233
Karazhan 3
Gruul's Lair 4
Magtheridon's Lair 1
Serpentshrine Cavern 9
Tempest Keep 8
Hyjal Summit 2
Black Temple 16
Zul'Aman 10
Sunwell Plateau 7
Heroic Dungeons 48
World / Outland 15
Unknown 110
Positioning diagram
Thaladred dies here (P1)Telonicus dies here (P1)Sanguinar dies here (P1)Capernian (P1)Kill first (P3)Kill second (P3)Kael'thas (P4)AldreadPhoenix Spawn (P4) - Kite in half circleMain TankHealers (P3)Ranged DPS (P3)Bow tanked here (P1)CharcharrAxe tanked here (P2)Weapons tanked here (P2)Main MC breaker (P3)ShankfacerCapernian 30 Yard Tank (P1)Destrana

Open Questions Confirm before next pull

  • Nether Scryer (Solarian trash) — does Mass Dispel actually remove the Mind Control? Source sheet calls this out as untested.
  • Capernian Conflagration — confirm the real range on the live server (sheet noted PTR bug where it hit past 30 yards).
  • A'lar P2 — can a single prot paladin reliably solo the boss through one Melt Armor cycle every pull, or do we plan for 2-tank rotation every cast?
  • Void Reaver — bear solo vs. 2-tank: which does the group default to on the first night?
  • Kael'thas Phase 2 weapons — final assignment per player (who loots Staff, Bow, Warp Slicer, Devastation, Cosmic Infuser, Infinity Blade, and the unassigned Shield + Mace + axe handler).
  • Kael'thas Phase 5 — Gravity Lapse positioning, Netherbeam spread distance, Nether Vapor cloud avoidance, and the interrupt rotation across P4 + P5 still need writing up.
← All guides

Heroic Dungeons

TBC Heroics
Raid admin
Most recent
Copy from

Heroic Dungeon Guides Coming soon

Heroic-mode guides for the TBC 5-mans (Slave Pens, Underbog, Mana-Tombs, Sethekk Halls, Shadow Labyrinth, Shattered Halls, Magisters' Terrace, etc.) will live here as we add them.
← All guides

Karazhan

11 bosses · Phase 1
Raid admin
Most recent
Copy from

Attumen the Huntsman Boss 1

Attumen the Huntsman

No notes yet for Attumen the Huntsman.

Moroes Boss 2

Moroes

No notes yet for Moroes.

Maiden of Virtue Boss 3

Maiden of Virtue

No notes yet for Maiden of Virtue.

Opera Event Boss 4

Opera Event

No notes yet for Opera Event.

The Curator Boss 5

The Curator

No notes yet for The Curator.

Terestian Illhoof Boss 6

Terestian Illhoof

No notes yet for Terestian Illhoof.

Shade of Aran Boss 7

Shade of Aran

No notes yet for Shade of Aran.

Netherspite Boss 8

Netherspite

No notes yet for Netherspite.

Chess Event Boss 9

Chess Event

No notes yet for Chess Event.

Prince Malchezaar Boss 10

Prince Malchezaar

No notes yet for Prince Malchezaar.

Nightbane Boss 11

Nightbane

No notes yet for Nightbane.

← All guides

Gruul's Lair

2 bosses · Phase 1
Raid admin
Most recent
Copy from

High King Maulgar Boss 1

High King Maulgar

No notes yet for High King Maulgar.

Gruul the Dragonkiller Boss 2

Gruul the Dragonkiller

No notes yet for Gruul the Dragonkiller.

← All guides

Magtheridon's Lair

1 bosses · Phase 1
Raid admin
Most recent
Copy from

Magtheridon Boss 1

Magtheridon

No notes yet for Magtheridon.

← All guides

Battle for Mount Hyjal

5 bosses · Phase 3
Raid admin
Most recent
Copy from

Rage Winterchill Boss 1

Rage Winterchill

No notes yet for Rage Winterchill.

Anetheron Boss 2

Anetheron

No notes yet for Anetheron.

Kaz'rogal Boss 3

Kaz'rogal

No notes yet for Kaz'rogal.

Azgalor Boss 4

Azgalor

No notes yet for Azgalor.

Archimonde Boss 5

Archimonde

No notes yet for Archimonde.

← All guides

Black Temple

9 bosses · Phase 3
Raid admin
Most recent
Copy from

High Warlord Naj'entus Boss 1

High Warlord Naj'entus

No notes yet for High Warlord Naj'entus.
Supremus Boss 2

Supremus

No notes yet for Supremus.

Shade of Akama Boss 3

Shade of Akama

No notes yet for Shade of Akama.

Teron Gorefiend Boss 4

Teron Gorefiend

No notes yet for Teron Gorefiend.

Gurtogg Bloodboil Boss 5

Gurtogg Bloodboil

No notes yet for Gurtogg Bloodboil.

Reliquary of Souls Boss 6

Reliquary of Souls

No notes yet for Reliquary of Souls.

Mother Shahraz Boss 7

Mother Shahraz

No notes yet for Mother Shahraz.

Illidari Council Boss 8

Illidari Council

No notes yet for Illidari Council.

Illidan Stormrage Boss 9

Illidan Stormrage

No notes yet for Illidan Stormrage.

← All guides

Zul'Aman

6 bosses · Phase 4
Raid admin
Most recent
Copy from

Akil'zon Boss 1

Akil'zon

No notes yet for Akil'zon.

Nalorakk Boss 2

Nalorakk

No notes yet for Nalorakk.

Jan'alai Boss 3

Jan'alai

No notes yet for Jan'alai.

Halazzi Boss 4

Halazzi

No notes yet for Halazzi.

Hex Lord Malacrass Boss 5

Hex Lord Malacrass

No notes yet for Hex Lord Malacrass.

Zul'jin Boss 6

Zul'jin

No notes yet for Zul'jin.

← All guides

Sunwell Plateau

6 bosses · Phase 5
Raid admin
Most recent
Copy from

Kalecgos Boss 1

Kalecgos

No notes yet for Kalecgos.

Brutallus Boss 2

Brutallus

No notes yet for Brutallus.

Felmyst Boss 3

Felmyst

No notes yet for Felmyst.

Eredar Twins Boss 4

Eredar Twins

No notes yet for Eredar Twins.

M'uru Boss 5

M'uru

No notes yet for M'uru.

Kil'jaeden Boss 6

Kil'jaeden

No notes yet for Kil'jaeden.

Guides

Dungeon Journal

Pick a raid to view boss mechanics, tank, healer and crowd control assignments, plus more.

About Dungeon Journals

How guides are ordered. They're grouped by where the guild is in its progression — the Active phase's raids first, then Upcoming, then Completed. This follows the active phase set on the Progression page, so there's nothing to set here.

Editing a guide (officers & GM). Open a raid by clicking its card, then use the Raid admin bar at the top of that guide:

  • Edit notes — turns on inline editing. Click into any boss's mechanics / notes and type your strategy; click Edit notes again to turn it off and save.
  • Edit video — paste a YouTube link for the raid's overview video (shows as “Watch overview” on the banner).
  • Edit resist gear — set the resist-gear requirements that surface on the boss pills.
  • Raid config — pick which raid config's roster the per-boss Tank / interrupt / CC and healer assignments read from.
  • Copy from — clone a previous config's per-boss assignments into this one (non-destructive: skips bosses that already have data).

Per-boss Tank / interrupt / CC dropdowns and healer assignments are edited inline on each boss while you're inside a raid guide.